Tufting is an exciting and versatile textile-making technique, perfect for DIY crafters, artists, and home decor lovers. Whether you’re creating custom rugs, wall art, or upholstery, having the right tools and materials is essential for a smooth and enjoyable tufting experience.
In this guide, we’ll walk you through the must-have tufting tools and materials, their functions, and tips on how to choose the best ones for your projects.
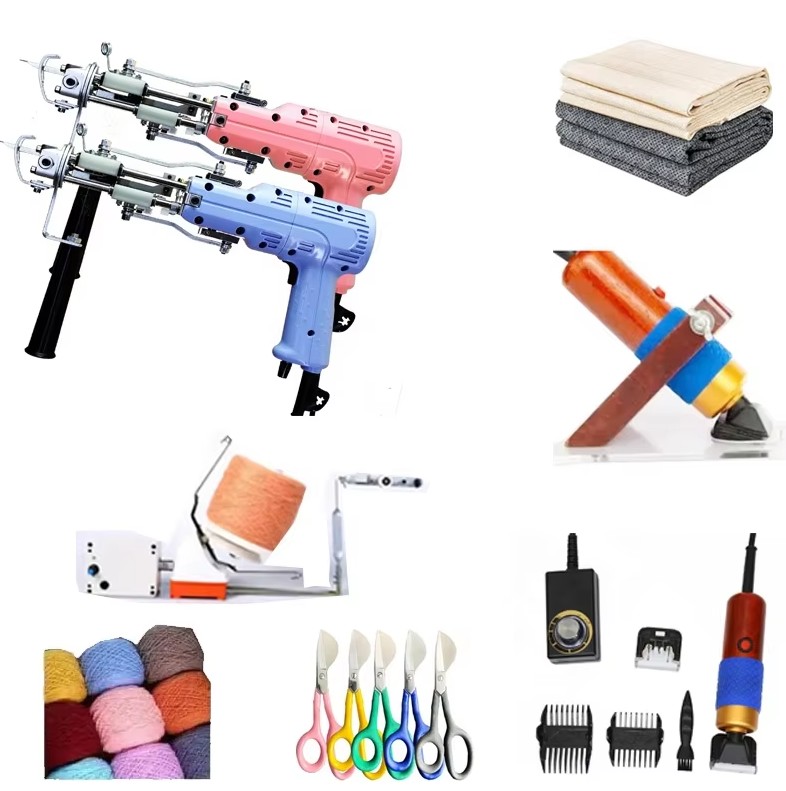
1️⃣ Tufting Gun – The Core Tool
📌 What is a Tufting Gun?
A tufting gun is the main tool used in modern tufting. It pushes yarn through a backing fabric, creating either loop or cut pile textures.
📌 Types of Tufting Guns:
1️⃣ Cut Pile Tufting Gun
✔ Cuts the yarn as it punches through the fabric.
✔ Creates a soft, plush finish.
✔ Ideal for modern and fluffy rugs.
2️⃣ Loop Pile Tufting Gun
✔ Loops the yarn instead of cutting it.
✔ Results in a structured and durable texture.
✔ Perfect for high-traffic rugs or geometric designs.
📌 How to Choose the Right Tufting Gun?
✔ If you’re a beginner, a cut pile gun is easier to manage.
✔ If you want durability, go for a loop pile gun.
✔ If you want flexibility, consider a dual-function gun that switches between both types.
💡 Pro Tip: Learning to control the speed and movement of the tufting gun is key to achieving even and clean designs.
2️⃣ Tufting Frame – Keeping Your Fabric Stretched
📌 Why Do You Need a Tufting Frame?
A tufting frame keeps the backing fabric stretched tightly, ensuring that the yarn stays secure and the design remains consistent.
📌 Types of Tufting Frames:
✔ DIY Wooden Frames – Affordable, customizable, and commonly used by tufting artists.
✔ Store-Bought Frames – Professionally made, often with adjustable sizes for flexibility.
✔ Adjustable Frames – Ideal if you work with different rug sizes frequently.
📌 How to Choose the Right Frame?
✔ If you’re starting out, a DIY wooden frame is the most budget-friendly option.
✔ If you want something ready-made, store-bought frames save time and effort.
💡 Pro Tip: Use carpet grippers or clamps to secure the fabric tightly to the frame!
3️⃣ Primary Backing Fabric – The Foundation of Tufting
📌 Why is the Backing Fabric Important?
The backing fabric is where the tufting process takes place, so choosing the right material affects how easy it is to tuft and the final look of your rug.
📌 Commonly Used Backing Fabrics:
✔ Monk’s Cloth – Soft, flexible, and beginner-friendly.
✔ Primary Tufting Fabric – Specifically designed for tufting, offering durability and ease of use.
✔ Burlap or Hessian – A budget-friendly option but not as durable as other fabrics.
📌 Which One Should You Use?
✔ For beginners: Monk’s Cloth is easy to work with.
✔ For professional rugs: Use Primary Tufting Fabric for better structure.
💡 Pro Tip: Avoid regular cotton fabric—it won’t hold the yarn securely enough!
4️⃣ Yarn – The Heart of Your Design
📌 How to Choose the Right Yarn?
✔ Acrylic Yarn – Affordable, available in many colors, but less durable.
✔ Wool Yarn – Soft, durable, and high-quality, commonly used in professional rugs.
✔ Cotton Yarn – Lightweight and natural, great for decorative tufting.
📌 What Yarn Thickness Should You Use?
✔ Thicker yarns = Plush, full rugs with a soft feel.
✔ Thinner yarns = More detailed and intricate designs.
💡 Pro Tip: Always check if the yarn is compatible with your tufting gun—some machines work best with specific yarn thicknesses.
5️⃣ Glue & Backing Materials – Securing Your Work
📌 Why Do You Need Glue?
After tufting, applying glue prevents the yarn from coming loose over time.
📌 Best Glues for Tufting:
✔ Carpet Adhesive – Strong, durable, and used in professional rug-making.
✔ Latex Glue – Flexible and commonly used in DIY tufting.
📌 Adding a Secondary Backing Fabric:
Once the glue dries completely, adding a secondary backing fabric (like felt or canvas) helps:
✔ Protect the glue layer.
✔ Give the rug a polished and professional finish.
💡 Pro Tip: Let the glue dry for at least 24-48 hours before handling your rug.
6️⃣ Scissors & Clippers – Shaping and Finishing Your Rug
📌 Essential Finishing Tools:
✔ Sharp Fabric Scissors – For cutting excess yarn & trimming edges.
✔ Electric Clippers/Trimmers – Helps even out the surface for a smooth finish.
✔ Rug Shears – For precise detailing & texturing.
💡 Pro Tip: Using high-quality clippers makes a huge difference in the final look of your rug!
7️⃣ Marking Tools – Sketching Your Design
📌 How to Transfer Your Design onto the Fabric?
✔ Fabric Markers – Ideal for drawing clear, visible lines on the backing fabric.
✔ Projector (Optional) – Some artists project an image onto the fabric to trace complex designs.
💡 Pro Tip: If you’re freehand drawing, use light-colored chalk or erasable markers for better accuracy!
8️⃣ Optional Tools for a Better Tufting Experience
📌 Additional Tools That Can Improve Your Workflow:
✔ Air Compressor – For pneumatic tufting guns, ensuring consistent power.
✔ Shears & Electric Trimmers – For precise detailing and finishing touches.
✔ Work Table & Proper Lighting – A comfortable setup improves efficiency & creativity.
💡 Pro Tip: A well-lit workspace reduces eye strain and helps you see your design details clearly.
9️⃣ Conclusion – Get Ready to Start Tufting!
📌 Quick Recap:
✅ Tufting Gun = The core tool for modern tufting.
✅ Tufting Frame & Fabric = Keeps everything stable for better results.
✅ Yarn = Determines the softness & durability of your rug.
✅ Glue & Finishing Tools = Essential for securing and refining your piece.
📌 Want to start tufting today? 👉 Check out the Tufting Mastery Class to learn the best techniques & create your first tufted masterpiece!
Now, are you ready to gather your tools and bring your tufting ideas to life? 🚀✨