Like any machine, your tufting gun or tufting machine needs regular maintenance to keep it running smoothly. One of the most overlooked but crucial maintenance tasks is checking and tightening screws.
Over time, vibrations from regular use can cause screws and bolts to loosen, leading to misalignment, unusual noises, and even potential damage.
In this guide, you’ll learn how to properly check and tighten screws on your tufting machine to ensure stability, precision, and longevity.
1️⃣ Why Checking and Tightening Screws is Important
📌 Common Problems Caused by Loose Screws:
❌ The needle may shift or vibrate, leading to uneven tufting.
❌ The machine may wobble or feel unstable during use.
❌ Loose screws in the motor or moving parts can cause misalignment or machine failure.
❌ Over time, loose screws may lead to permanent damage to your machine.
💡 Pro Tip: If you notice inconsistent tufting, extra noise, or excessive machine movement, it’s time to check the screws!
2️⃣ Tools You’ll Need
Before starting, make sure you have the right tools to avoid damaging the screws.
✔ Screwdrivers (Phillips & flat-head) – To tighten standard screws.
✔ Allen Wrench Set – Some tufting guns have hex screws that require these.
✔ Adjustable Wrench – For securing nuts & bolts.
✔ Thread Locker (Optional) – Helps prevent screws from loosening too quickly.
💡 Pro Tip: Keep a small toolkit near your workspace so you can easily tighten screws as needed.
3️⃣ Step-by-Step Guide to Checking & Tightening Screws on a Tufting Machine
🔹 Step 1: Turn Off & Inspect the Machine
✔ Unplug the machine before working on it.
✔ Check for loose screws visually & by gently pressing different parts of the machine.
📌 Signs of Loose Screws:
- Wobbling or unusual movement in the handle, motor, or base.
- Clicking or rattling sounds when using the machine.
- Misalignment of the needle or moving parts.
🔹 Step 2: Tighten the Key Screws & Bolts
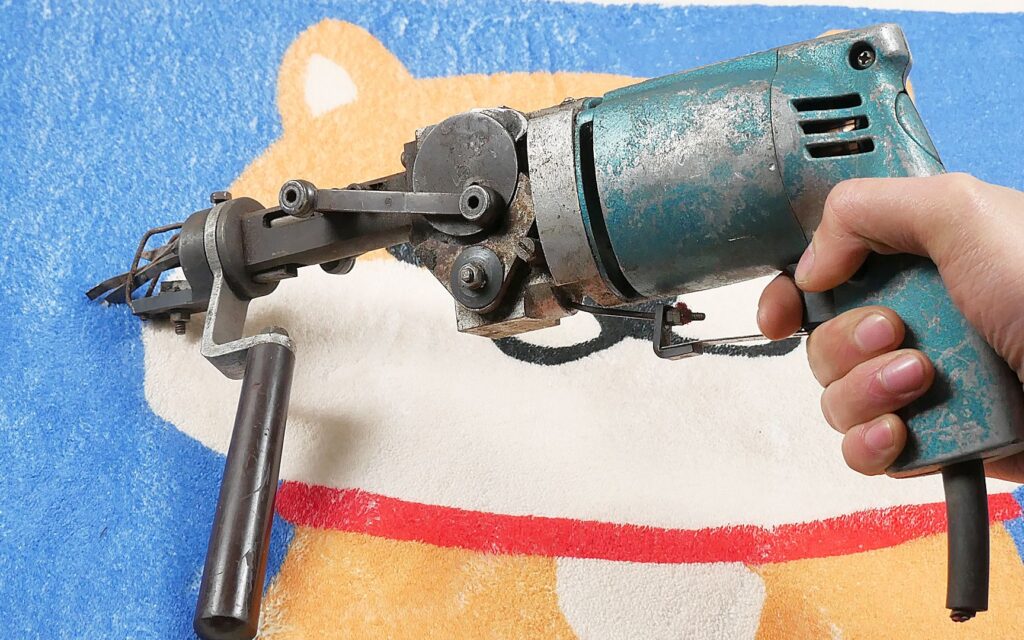
📌 1. Handle & Grip Screws
✔ Location: Screws on the handle where you hold the tufting gun.
✔ Purpose: Keeps the grip stable while tufting.
✔ How to Fix: Use a screwdriver to gently tighten if loose.
📌 2. Needle Bar & Moving Parts Screws
✔ Location: Near the needle mechanism & moving metal parts.
✔ Purpose: Ensures smooth tufting & prevents misalignment.
✔ How to Fix: Use an Allen wrench or screwdriver to tighten, but don’t overdo it—too much pressure can cause jamming.
📌 3. Motor Mounting Screws
✔ Location: Screws securing the motor to the frame.
✔ Purpose: Prevents vibration and motor misalignment.
✔ How to Fix: Use a wrench to ensure they are snug but not overtightened.
📌 4. Base Plate Screws (For Stability)
✔ Location: At the bottom of the machine, securing it to the frame.
✔ Purpose: Keeps the machine balanced & prevents excessive movement.
✔ How to Fix: Tighten using a wrench or screwdriver, ensuring all screws are even.
💡 Pro Tip: If a screw keeps loosening frequently, apply a small drop of thread locker to hold it in place!
🔹 Step 3: Test the Machine & Make Final Adjustments
✔ Turn on the machine & run a test on scrap fabric.
✔ Listen for any unusual noises or vibrations.
✔ If needed, recheck and tighten any remaining loose screws.
💡 Pro Tip: After every 10-15 hours of use, quickly check the main screws to prevent them from loosening over time.
4️⃣ Common Mistakes to Avoid
🚨 Over-Tightening Screws → Can strip the screw head or damage parts.
🚨 Forgetting to Check the Needle Screws → May cause uneven tufting or needle misalignment.
🚨 Ignoring Strange Noises → Often a sign of loose internal screws!
🚨 Using the Wrong Screwdriver Size → Can damage the screw head, making future adjustments difficult.
💡 Pro Tip: Keep a maintenance log to track when you last checked & tightened screws!
5️⃣ Conclusion – Keep Your Machine Stable & Reliable!
📌 Quick Recap:
✅ Regularly check & tighten screws to prevent misalignment & vibration.
✅ Focus on key areas – Handle, needle bar, motor mounts, and base screws.
✅ Use the right tools – A screwdriver, Allen wrench, and adjustable wrench.
✅ Apply thread locker if needed to prevent frequent loosening.
✅ Test the machine after adjustments to ensure smooth operation.
Now, is your tufting machine secure and ready for action? 🚀✨