When most people think of tufting, they imagine using a motorized tufting gun. But did you know you can also create beautiful rugs using a hand tufting tool?
This traditional, manual method allows for more precision, artistic control, and a meditative crafting experience. In this guide, we’ll explore what a hand tufting tool is, how it works, and whether it’s the right tool for your rug-making journey!
1️⃣ What Is a Hand Tufting Tool & How Does It Work?
A hand tufting tool is a manual punch needle tool that pushes yarn into the fabric backing without using a motor. Unlike a tufting gun, it requires hand movements to control the yarn flow, making it a more hands-on and artistic technique.
📌 How It Works:
✔ The tool pierces the fabric and loops the yarn through.
✔ The yarn stays in place as you gradually build up your design.
✔ You can create loop pile or cut pile effects depending on the tool and technique.
💡 Best For:
✔ Small, detailed rugs
✔ Artists who love precision & slow crafting
✔ People who prefer a quieter, motor-free experience
2️⃣ Hand Tufting Tool vs. Tufting Gun – Which One Should You Choose?
| Feature | Hand Tufting Tool | Tufting Gun |
|---|---|---|
| Speed | Slow, requires manual effort | Fast, motorized |
| Precision & Control | High precision, great for small details | Less precise, best for large areas |
| Physical Effort | Requires hand movement & patience | Less effort, more efficiency |
| Durability of Rug | Extremely durable, tight loops hold well | Strong, but may need glue reinforcement |
| Noise Level | Silent | Loud (motorized) |
| Best For | Small artistic rugs, intricate designs | Large rugs, commercial production |
💡 Takeaway:
- If you want artistic control & a meditative process, choose Hand Tufting Tool.
- If you need speed & efficiency, go with a Tufting Gun.
3️⃣ How to Use a Hand Tufting Tool – Step-by-Step Guide
📌 Step 1: Gather Your Materials
✔ Hand tufting tool (manual punch needle)
✔ Tufting frame with tightly stretched fabric
✔ High-quality yarn (4-ply or thicker)
✔ Fabric backing (Monk’s Cloth or Primary Tufting Cloth)
📌 Step 2: Set Up Your Design
✅ Secure your fabric tightly on the frame.
✅ Transfer your design using a marker or projector.
📌 Step 3: Start Tufting
✅ Insert the yarn into the hand tufting tool.
✅ Hold the tool at a consistent angle and push it through the fabric.
✅ Slowly move in small, controlled motions to maintain uniform loops.
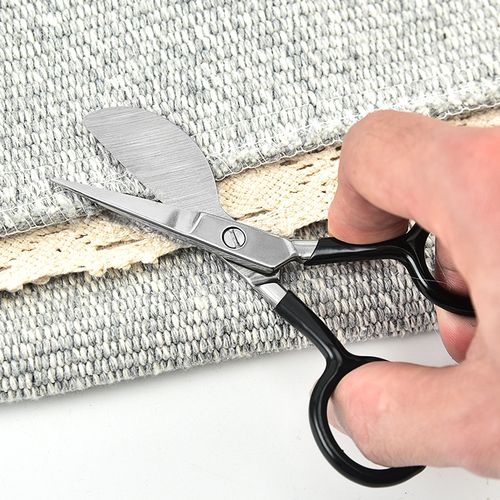
📌 Step 4: Finishing the Rug
✅ Apply latex-based glue to secure the yarn.
✅ Trim the surface with scissors or clippers for a clean finish.
💡 Pro Tip: Work slowly and steadily—unlike a tufting gun, this method takes time and patience.
4️⃣ Best Hand Tufting Tools & Where to Buy Them
📌 Top Recommended Hand Tufting Tools:
✔ Oxford Punch Needle – Best for loop pile tufting
✔ Adjustable Punch Needles – Allows different loop heights
✔ Aari Tufting Needle – Great for artistic, fine detailing
📌 Where to Buy?
🛍 Available on Amazon, Etsy, and specialty tufting stores.
💡 Pro Tip: If you’re a beginner, start with a mid-sized punch needle for easier handling.
5️⃣ Common Hand Tufting Problems & How to Fix Them
🚨 Issue: Yarn Keeps Slipping Out
✅ Use thicker yarn (4-ply or more) to improve grip.
🚨 Issue: Fabric Gets Damaged
✅ Make sure you pierce the fabric cleanly without forcing the needle.
🚨 Issue: Uneven Pile Height
✅ Keep your hand steady and consistent for uniform loops.
💡 Pro Tip: Practice on scrap fabric first before starting a full rug project!
6️⃣ Conclusion – Is Hand Tufting Right for You?
📌 Quick Recap:
✅ Hand Tufting Tools = Precision, artistic control, meditative process.
✅ Tufting Gun = Fast, efficient, best for large rugs.
✅ If you love slow crafting & detailed work, try hand tufting!
Now, will you try hand tufting, or are you sticking to a tufting gun? 🚀✨